Most underfloor heating complaints arrive at the manifold cabinet, but only some of them start there. A cold loop, a floor that heats unevenly, a drip under the flow bar, a pump that runs and warms nothing — the manifold is the one component an installer can see and touch, so it takes the blame for hydraulic, control and commissioning faults that originate elsewhere. The point of this guide is to separate the symptom from the cause. Twelve problems, each with what you observe, what is usually behind it, and what to do — in the order a commissioning engineer would work them, cheapest and most likely first.
Everything below is general industry guidance, not a WARMHAUS-specific specification. Flow rates, torque figures, test pressures and temperature limits vary by manifold design, pipe type and pump — always confirm the figures against the technical datasheet of the manifold, pipe and pump you are actually using before you touch a commissioned system. Where a problem overlaps with the initial build, our underfloor heating manifold installation guide covers the assembly sequence in more depth.
I. Symptom-to-Cause Diagnostic Table
Work this table top to bottom. It starts with the faults that cost nothing to check and ends with the ones that need the floor opened or the pump changed. If two rows match your symptom, clear the earlier one first — it is more common, and fixing it often makes the later symptom disappear.
| Symptom at the floor | Most likely cause | Where to check | Typical fix |
|---|---|---|---|
| One loop stays cold, others warm | Loop valve shut or actuator not lifting | Return bar valve · actuator head | Open the valve, verify actuator stroke |
| All loops lukewarm, none hot | Low supply temperature or mixing set too low | Mixing group · flow thermometer | Reset mixing temperature to design value |
| Gurgling, then a cold loop | Air trapped at the loop high point | Automatic air vent · flow bar | Purge loop by loop, refill under pressure |
| Short loops hot, long loops cold | Flow not balanced across loops | Flow meters on the flow bar | Throttle short loops, open long loops |
| Floor warm near manifold only | Insufficient circulation in that loop | Flow meter reading · loop length | Rebalance; check for a kinked pipe |
| Drip at a compression connection | Under-tightened or misaligned eurocone | Pipe-to-manifold adaptors | Re-cut square, reseat insert, retighten |
| Weep at a manifold body joint | O-ring damage or overtightened union | Bar joints · end caps | Replace seal, re-tighten to torque (see §III) |
| Pump runs, floor stays cold | Zone valve or actuator closed on all ports | Wiring centre · actuator heads | Confirm call for heat reaches actuators |
| Floor overheats, screed too hot | Failed or bypassed mixing control | Thermostatic head · limit sensor | Restore limit control before running |
| Flow meters read zero on all loops | System not filled or pump not running | Fill loop · pump speed setting | Refill, vent, confirm pump operation |
| Pressure falls overnight | Leak, or air being released from fill water | Gauge · cabinet floor · joints | Isolate loop by loop to locate |
| Rooms heat but never reach setpoint | Undersized emitter output or control fault | Thermostat siting · loop spacing | Verify design load and sensor position |
Values and sequences are general industry guidance, not a WARMHAUS-specific specification. Manifold construction, valve type and mixing-group behaviour differ between systems. Always confirm against the datasheet supplied with the manifold, pipe and pump you are using before adjusting a live installation.
II. Flow and Circulation Faults (Problems 1–4)
Many manifold complaints are circulation problems in disguise. Water is either not moving through a loop, or moving through the wrong loops in the wrong proportion. Neither is a manifold defect — both are commissioning work that was skipped or never finished.
I. One loop stays cold while the rest warm up
The classic first call. Before anything else, check that the loop’s shut-off valve on the return bar is actually open and that the actuator head on that port is lifting. A thermal actuator that never receives a call for heat sits closed, so the loop reads cold while everything around it works — and the cause is almost always electrical rather than hydraulic: a thermostat not calling, a wiring-centre channel not made off, a blown fuse on that zone, or a head fitted to the wrong port.
Diagnose it by removing the head from the valve. With the head off, the valve pin returns to its open position and the loop should warm within a few minutes. If it warms with the head off, the fault is in the control side, not the manifold. If it stays cold with the head off, the loop itself is blocked — air, a closed return valve or a crushed pipe.
One detail worth knowing, because it is widely misunderstood: many thermal actuators ship in a first-open condition, a transit feature that holds the valve open so the system can be filled, flushed and pressure-tested before any wiring exists. It is not a permanent mode and it is not a failure mode — the first time the head is energised, the mechanism latches out and the actuator behaves normally from then on. Because first-open holds a port open, it never causes a cold loop. What it can mask is the opposite fault: a loop that stays warm regardless of its thermostat, on a system that has been filled but never powered up. Allow several minutes for any thermal actuator to stroke; they are slow by design, and judging one in thirty seconds produces a lot of unnecessary call-backs.
II. Loops heat unevenly — short circuits hot, long circuits cold
Water follows the path of least resistance. Put a 60 m loop and a 110 m loop on the same manifold without balancing and the short loop takes a disproportionate share of the flow, so it runs hot while the long loop barely warms. This is what the flow meters on the flow bar are for: throttle the short loops down until each circuit carries the flow its design calls for. Balancing is done with the system warm and the pump at its working speed — balancing cold gives readings you will have to redo.
III. Air locks and gurgling
Air collects at the high points of a circuit and stops flow dead. You hear it before you feel it: gurgling or trickling in the cabinet, then a loop that goes cold. Purge one loop at a time — close every other circuit, drive water through the open loop until it runs clear at the drain, then move on. Purging all loops at once just pushes air around the manifold. Automatic air vents on the bars handle what accumulates afterwards, but cannot clear a loop that was never properly filled.
IV. Pump running, nothing heating
If the circulator is audibly running and every flow meter reads zero, water is not reaching the loops at all. Check in this order: is the system filled and at pressure; are the isolation valves between heat source and manifold open; are all actuator heads closed because no thermostat is calling. A modulating pump left on a very low curve can also fail to overcome the resistance of long circuits.

III. Leaks and Mechanical Faults (Problems 5–8)
Leaks at a manifold are almost never a cracked body. They are connections: the pipe-to-manifold adaptor, the union between bars, the end cap, the drain cock. Each has a fix that does not involve replacing the manifold.
A manifold rarely leaks. Connections leak — and a connection is something one person can put right in ten minutes.
V. Weeping compression connections at the loop ports
The eurocone connection between pipe and manifold seals on a compression ring against a support insert inside the pipe. Three things break that seal: a pipe end cut at an angle instead of square, an insert not pushed fully home, and over-tightening, which distorts the ring rather than compressing it. The fix is to strip the connection back, cut the pipe square with a proper pipe cutter, fit a fresh insert and ring, and re-tighten to a torque figure — not to the point where it stops turning.
That figure is worth knowing as an order of magnitude, because “tighten to the datasheet” is no help when a floor is leaking and the datasheet is in an office forty kilometres away. A eurocone seals on a cone rather than on the thread, so it has a target torque rather than a “nip it up” instruction. Typical published figures for a G3/4″ eurocone nut on a brass port sit in the region of 25–35 N·m. Both directions of error leak: too loose and the cone never beds onto its seat; too tight and the nut or the insert deforms, after which the joint will not seal even if you slacken it and start again — the part is scrap and needs replacing, not re-tightening.
Treat 25–35 N·m as indicative industry orientation only. The binding value is the one printed on the datasheet of the specific manifold and adapter in front of you, it varies with port thread size and with the pipe the adapter is made for, and it should be applied with a torque wrench rather than judged by wrist. The full thread and torque detail sits in our manifold sizing guide. If you take one thing from this section: a torque wrench in the van is cheaper than one lifted floor.
VI. Leaks between manifold bars or at the end caps
A weep at a body joint usually means a pinched or aged O-ring, or a union overtightened until the seal extruded. Depressurise, dismantle the joint, inspect the seal seat for scoring, replace the seal and reassemble. Seals age faster on systems repeatedly drained and refilled with untreated water — a maintenance issue rather than a product fault, and worth saying so to the end client.
VII. Pressure loss overnight with no visible leak
Not every pressure drop is a leak — a freshly filled system releases dissolved air for days, and the gauge falls as it vents. Distinguish the two by isolating: close all loops, hold pressure on the manifold alone, and watch the gauge. If it holds, the loss is in the buried pipework or is simply air; if it falls with everything closed, the fault is in the manifold assembly. Pressure-test before the screed goes down and keep the loops under test pressure while it is poured — that is the only practical protection against a leak in a buried circuit.
VIII. Corrosion, staining or seized valve spindles
Green staining, seized spindles and stiff flow meters usually point to system water chemistry or a wet cabinet, not to the manifold itself. Dissimilar metals in an untreated, oxygen-rich system accelerate the process, which is why oxygen-barrier pipe matters on any circuit sharing water with steel or cast-iron components. Both faults are fixed at the design stage, not with a spanner.
IV. Control and Temperature Faults (Problems 9–12)
These get misdiagnosed most often, because the manifold hardware is healthy and the fault is in what tells it to open, close or mix. If a floor’s behaviour changes with the weather, the time of day or which room is occupied, look here first.
Mixing group set too low — everything lukewarm
Every loop is faintly warm and the room never reaches setpoint. The mixing valve is blending the primary flow down below the design temperature for the floor construction. Fix: read the flow thermometer on the manifold, compare against the design flow temperature for the screed and floor covering, and reset the thermostatic head. Very low settings are sometimes left in place from a commissioning test and never restored.
Actuators wired to the wrong ports
A thermostat calls, but a different room heats. On a manifold with six or eight ports it is easy to cross wires when the loops were labelled after the pipe was laid. Fix: call each zone individually from the thermostat and confirm which actuator lifts and which loop warms, then re-label the ports permanently at the wiring centre — not on tape that falls off.
Thermostat sited where it reads the wrong temperature
A room sensor in a draught, in direct sun, above a radiator or on an external wall reports a temperature the occupants never feel, so the floor short-cycles or runs continuously. Fix: relocate to an internal wall at normal mounting height, clear of doors and heat sources. A floor sensor also needs to sit in its conduit within the screed, not taped underneath it.
High-limit protection defeated — the floor overheats
Surface temperature climbs beyond what the floor covering tolerates, and timber or vinyl finishes suffer for it. The safety limit thermostat has failed, been bypassed during commissioning, or was never fitted. Fix: restore a working high-limit device on the manifold flow before the system runs again. This one is not a comfort issue — it protects the floor construction. Specific limit values: refer to the floor-covering manufacturer’s data.Manifold and control component specifications: available on request.
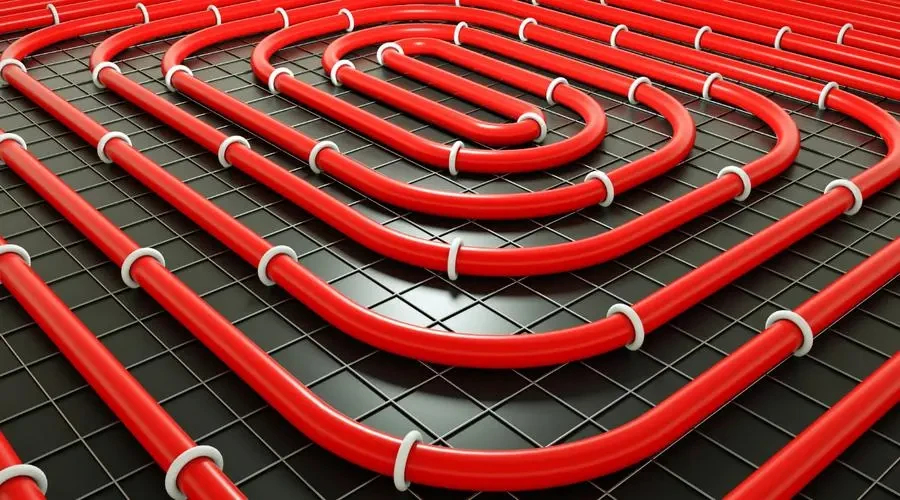
V. A Commissioning Sequence That Prevents Most of These
Most of the twelve problems above are commissioning faults rather than product faults — the hardware was sound when it left the crate, and something was left undone on site. Problems I to V, IX and X sit squarely in that group: closed ports, unbalanced loops, trapped air, a pump fighting closed actuators, a connection tightened by feel, a mixing setpoint left at a commissioning test value, and crossed actuator wiring. Three do not. The aged or pinched O-ring in problem VI is wear and water quality; the corrosion in problem VIII is system chemistry settled at design stage; the thermostat siting in problem XI is a design decision made before anyone opened the cabinet. Those three are worth separating out precisely because no commissioning routine prevents them.
The preventable ones go away by doing the same five things in the same order on every job: fill and purge loop by loop, pressure-test before the screed and hold pressure while it cures, balance with flow meters while the system is warm, prove each thermostat against each actuator individually, and record the loop lengths and final flow-meter settings in the cabinet so the next person is not guessing. That last step costs five minutes and removes most of the diagnostic work from any future call-out.
The record matters commercially too. When a distributor gets a complaint about a floor, the first question is whether the system was ever balanced — and if nobody wrote the settings down, the conversation defaults to blaming the hardware. Our technical FAQ covers what comes up earlier, at the specification and ordering end.
VI. Specify the Manifold and Controls So They Match
Several of the faults above are made worse by mismatched components: actuators that do not suit the valve thread, eurocone adaptors sized for a different pipe outside diameter, a mixing group specified separately from the bars it bolts to. WARMHAUS is a manufacturer of PPR, PEX and brass piping systems — not a trading company. The brass machining lines that produce our underfloor heating manifolds are our own, and the thermostats, actuators and control components are specified against them, so port threads, insert sizes and actuator strokes are held to one internal standard instead of averaged across suppliers.
Manufacturing since 1993 across three plants, ISO 9001 / ISO 14001 / ISO 45001 certified, EU CE marked and SGS tested. No MOQ — which matters when a distributor is stocking manifolds in several port counts and does not want to commit a container to each variant. Standard lead time is 45 days from confirmed order, planned into production slots rather than promised loosely. Request manifold specifications, control compatibility data and distributor terms — tell us the port counts and pipe sizes you sell and we will send the matching range. Certificate documents and detailed test documentation: available on request.