Almost every PPR leak traces back to one moment: the weld. Get the temperature, heating time, insertion depth and cooling right and a hot-melt joint is as strong as the pipe itself — no glue, no threads, no metal to corrode. Get any of them wrong and the joint fails under pressure, and on a job site that means callbacks, torn-up walls, and labor you pay for twice. This guide walks through how to weld PPR pipe correctly: the hot-melt principle, a temperature and time chart by pipe diameter, a clean step-by-step method, and the exact reasons joints leak — so an installer can follow it and get zero rework.
A quick note on who this is for. Across the Middle East, North Africa, Southern Europe and Latin America — where PPR is the mainstream hot-and-cold water system — installers weld PPR every day, but the parameters live in scattered videos and comment threads. Here they are in one place, framed as general industry guidance. Always confirm the exact figures on the technical datasheet of the pipe and machine you are using before production welding.
I. How Hot-Melt (Fusion) Welding Actually Works
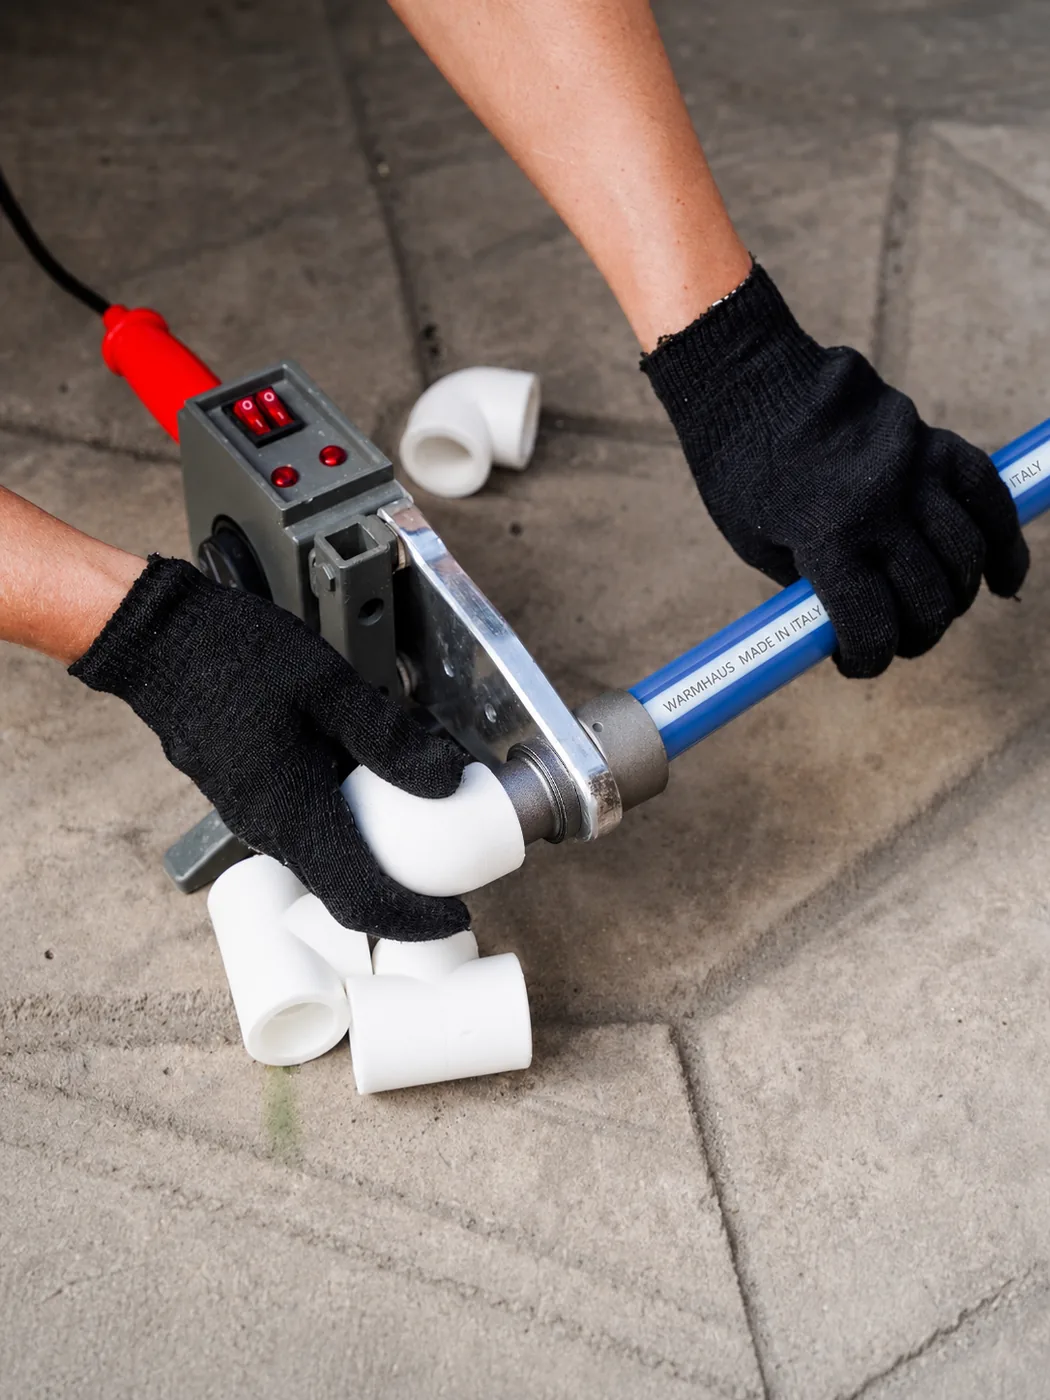
Hot-melt welding — also called socket fusion — does not glue or clamp two parts together. It melts them into one. A PPR welding machine heats a male die and a female die to the working temperature. You push the pipe into the female die and the fitting onto the male die at the same time, so the outer surface of the pipe and the inner surface of the fitting soften together. When both are molten, you pull them off the dies and push the pipe straight into the fitting. As the two softened layers meet, the polypropylene chains inter-diffuse and, on cooling, set into a single continuous piece of material — not a bonded joint, but one homogeneous wall.
No seam, no adhesive, no gasket to age — a correct hot-melt weld does not join two parts. It leaves one.
That is why a correct PPR weld cannot leak the way a glued or threaded joint can: there is no seam, no adhesive, and no gasket to age. It also explains why the three variables in the chart below — temperature, heating time and cooling time — decide everything. Too little heat and the layers never truly fuse; too much and the molten material collapses the bore. The whole method is a controlled melt, and the chart is how you control it. It is also why hot-melt joints are a core argument for the PPR system as a whole.
II. PPR Welding Temperature & Time Chart (by Pipe Diameter)
The working temperature for PPR hot-melt welding is broadly standard at around 260 °C — what changes with pipe size is how long you heat, how deep you insert, and how long you let it cool. The table below gives typical industry values for general guidance only. Actual heating and cooling times vary with ambient temperature, pipe wall thickness (PN class) and machine, so always confirm against the datasheet of the pipe and welding machine you are using before you weld a live system.
| Pipe Ø (mm) | Welding temp | Heating time | Insertion depth | Cooling time |
|---|---|---|---|---|
| 20 mm | ~260 °C | ~5 s | ~14 mm | ~2 min |
| 25 mm | ~260 °C | ~7 s | ~16 mm | ~2 min |
| 32 mm | ~260 °C | ~8 s | ~18 mm | ~4 min |
| 40 mm | ~260 °C | ~12 s | ~20 mm | ~4 min |
| 50 mm | ~260 °C | ~18 s | ~23 mm | ~4 min |
| 63 mm | ~260 °C | ~24 s | ~26 mm | ~6 min |
Values are general industry guidance, not a WARMHAUS-specific specification. Colder weather lengthens heating and cooling times; thicker-walled (higher-PN) pipe may need slightly longer. When in doubt, follow the printed datasheet supplied with the pipe and machine.
Request the printable Welding Temperature & Time Chart (PDF) — a one-page, wall-ready version of this table plus a quick leak-fix checklist. Need the right machine and dies for these diameters? See WARMHAUS welding tools.
III. How to Weld PPR Pipe: Step by Step
Follow these five steps in order. They map exactly to the chart above — read your pipe diameter across the row, then work through the steps.
I. Cut square, deburr, clean — and mark the depth
Cut the pipe square with a pipe cutter — not a hacksaw that leaves a ragged, angled end — then chamfer and deburr the end so it slides into the socket cleanly without shaving off material that would jam the fusion. Wipe the pipe end and the fitting socket with a clean, dry, lint-free cloth: no water, oil or dust on the fusion surfaces. Finally, mark the insertion depth from the chart on the pipe with a marker so you can see when it is fully home.
II. Heat the machine and fit the dies
Fit the heating dies for your diameter, switch on the PPR welding machine, and let it reach the working temperature (~260 °C) before you start. Welding on a cold or still-heating machine is a top cause of weak joints.
III. Heat pipe and fitting together
Push the pipe into the female die and the fitting onto the male die at the same moment, and hold for the heating time for that diameter — no twisting, no wiggling. Both surfaces must soften evenly.
IV. Join straight — never twist
Pull both parts off the dies and push the pipe straight into the fitting up to your depth mark in one smooth motion, without rotating either part. Twisting shears the molten layer and creates leak channels.
V. Hold and cool
Keep the joint aligned and completely still for the cooling time in the chart before you handle, move or pressure-test it. The fused material is setting into one continuous piece — disturb it now and you break the weld. Working with PPR pipe and fittings that match — same tolerances, same socket dimensions — makes every one of these steps more repeatable.
IV. Why PPR Joints Leak — and How to Prevent It
A correctly welded PPR joint does not leak. When one does, the cause is almost always a controllable error at the weld. Here are the common ones and their fixes — this is the list installers scan when a pressure test fails.
Under-heating
The layers never fully fused; the joint looks fine but holds only a weak, partial bond. Fix: reach working temperature before welding and hold the full heating time for the diameter.
Over-heating
Molten material collapses inward, narrowing or closing the bore, with excess flash at the socket. Fix: do not exceed the heating time — never hold on the die for “extra seconds” once it is at temperature.
Twisting on insertion
Rotating shears the softened layer and cuts spiral leak channels through the fusion zone. Fix: push straight in, in one motion — never rotate pipe or fitting after heating.
Insufficient insertion depth
The pipe is not seated to full depth, leaving too little fused surface to hold pressure. Fix: mark the depth from the chart and insert until the mark meets the socket.
Moving before cooled
The joint is knocked or stressed while still soft, so the weld sets misaligned or cracked. Fix: hold aligned and still for the full cooling time before handling or pressurizing.
Dirty or wet surfaces
Water, oil or dust on the fusion faces blocks a clean melt and contaminates the bond. Fix: wipe pipe end and socket with a dry, lint-free cloth immediately before heating.
Wrong or worn dies · wrong machine temperature
Mismatched or worn dies heat unevenly and give inconsistent welds from joint to joint. Fix: use dies matched to the diameter and verify the machine holds ~260 °C — see WARMHAUS welding machines and dies.
V. Weld It Right — With Tools, Pipe and Fittings That Match
A leak-free PPR weld comes down to three things fitting each other: the machine, the pipe, and the fittings. When they come from different sources, dies, wall thicknesses and socket tolerances can drift — and drift is where leaks start. WARMHAUS builds all three. We are a manufacturer of PPR, PEX and brass piping systems, not a trading company: the extrusion, injection-moulding and machining lines are our own, which is why socket dimensions and pipe tolerances are held to one internal standard instead of averaged across suppliers. We supply PPR hot-melt welding machines for the 20–63 mm range together with the matching PPR pipe and full fitting range — sockets, elbows, tees and more. Manufacturing since 1993, a complete product range, ISO 9001 / ISO 14001 / SGS / CE certified — third-party marks a specifier can verify in the issuing body's own register rather than take on trust. One matched, certified system for installers, distributors and projects across the Middle East, North Africa, Southern Europe and Latin America.
Tell us your market and the diameters you install, and we will send the PPR system specifications, the welding-tool range, certifications and distributor terms. MOQ, lead times, pricing and exact certificate numbers — available on request.