Technical Guide Installation guide
Underfloor Heating Manifold Installation & Balancing — A Step-by-Step Guide
The manifold is the heart of any underfloor heating system. Get the installation and flow balancing right and the floor heats evenly for decades; get it wrong and the fault is buried under the screed. Here is the whole job — parts, six installation steps, flow-meter balancing, actuator and thermostat wiring — plus the mistakes that cause callbacks.
The manifold splits one supply into multiple floor loops, controls the flow to each one, and carries the actuators that switch zones on and off. Get the manifold installation and flow balancing right and the floor heats evenly, runs efficiently, and never gets touched again. Get it wrong and you have cold spots, wasted energy, or worse — a leak buried under the screed. This guide walks an installer through the whole job: the manifold parts, the step-by-step installation, balancing the loops with flow meters, and wiring the actuators to the thermostat — plus the common mistakes that cause callbacks.
It is written for the people who actually handle the system: plumbing and heating installers fitting a manifold on site, distributors who need an install reference to hand their customers, and project buyers confirming a system can be commissioned cleanly. The steps are general good practice for any quality manifold; where a value would be a manufacturer-specific spec, always confirm it against the product datasheet before you commission. Underfloor heating is a premium, high-margin system — installing it right is what turns a first order into a reorder. For the hardware itself, see the WARMHAUS brass manifold range and the wider underfloor heating system.
I. Underfloor Heating Manifold Parts, Explained
Before installing anything, know what each part does — most balancing and wiring mistakes come from not reading the manifold correctly. A typical manifold is two horizontal bars, usually brass, mounted one above the other:
| Part | What it does |
|---|---|
| Flow bar | The top bar; feeds heated water out to each loop. Carries the flow meters. |
| Return bar | The bottom bar; collects cooled water back from each loop. Carries the actuator valves. |
| Flow meters (flow gauges) | One per loop on the flow bar. Set and display each loop’s flow rate — the tool you balance with. |
| Actuator valves | One per loop on the return bar. The electrothermal actuator screws on here to open or close the loop on thermostat demand. |
| Isolation valves | Shut off the whole manifold from the supply and return for service without draining the system. |
| Air vents / drain-fill valves | At the manifold ends; purge trapped air and fill or drain loops during commissioning. |
| Temperature gauges | Show flow and return temperature so you can confirm the floor is running in the safe range. |
| Pump / mixing group (if fitted) | Blends hot boiler water down to a floor-safe temperature and circulates it through the loops. |
The number of ports tells you the number of loops — a 2-to-8-port manifold serves 2 to 8 heating circuits, and larger jobs gang manifolds together. The key thing for installation: the flow meters live on the flow bar (balancing), the actuators live on the return bar (control) — mix those up and nothing works as intended. See the WARMHAUS manifold range (2–8 ports) with built-in flow meters.
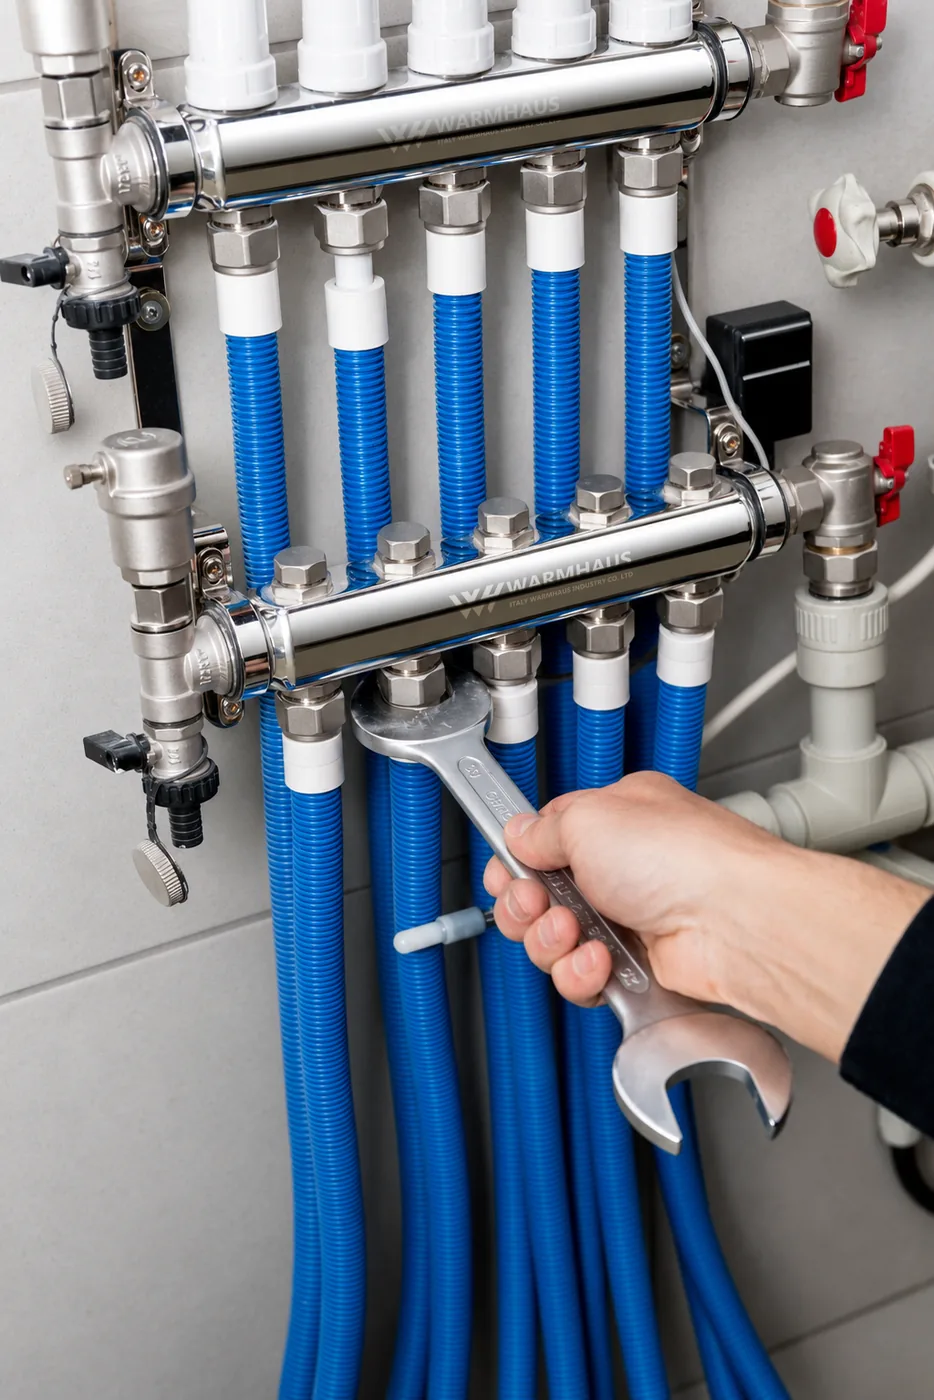
II. How to Install an Underfloor Heating Manifold — Step by Step
These six steps are the standard sequence for a clean, testable install. Follow them in order — the order is what keeps you from burying a fault under concrete.
I. Mount the manifold
Fix the manifold to a wall or into a manifold cabinet, above the finished floor level, and use a spirit level so both bars sit perfectly horizontal. Level matters: a tilted manifold traps air in the high loops and skews your flow readings. Leave clearance below for the loop bends coming up out of the floor and above for the actuators and wiring.
II. Connect the supply and return
Bring the flow and return from the heat source to the manifold isolation valves, keeping flow to the flow bar, return to the return bar. If the system uses a pump/mixing group or a thermostatic blending valve to protect the screed from over-temperature water, fit it here between the heat source and the manifold.
III. Connect the PEX loops
Cut each oxygen-barrier PEX-B loop square, push in the pipe support sleeve, and connect it to the manifold outlet with a compression or Euro-cone insert fitting — hand-tight, then wrench to the fitting’s spec, no more. Number every loop and write down its length. You will need those lengths to balance flow in Step V. For the pipe side of the job, see WARMHAUS PEX-B pipe.
IV. Pressure-test and flush
Fill the system, then purge air one loop at a time through the drain valves until each runs clear. Pressure-test to the required test pressure and hold — before any screed is poured. This is the single most important step in the whole job. Leave the loops under pressure during the screed pour so any damage shows up immediately.
A leak found now is a fitting re-seated in five minutes; a leak found after the pour is a broken floor.
V. Balance the loops with flow meters
With the pump running and the floor filled, adjust each loop’s flow meter so its flow rate matches its loop length — covered in detail in the next section. Balancing is what makes the whole floor heat evenly.
VI. Fit actuators and wire the thermostat
Screw an electrothermal actuator onto each return-bar valve, then wire the actuators and room thermostats — covered after the balancing section. Commission the system, confirm each zone opens on demand, and hand over.
Want this as a one-page site reference? Request the full Installation PDF — six-step install diagram, balancing quick-reference table and the common-mistakes checklist — or go straight to the WARMHAUS underfloor heating manifold.
III. How to Balance an Underfloor Heating Manifold with Flow Meters
Balancing is the step that separates a floor that heats evenly from one with cold corners — and it is the step installers most often skip. The idea is simple: water is lazy and takes the easy path. Left alone, most of the flow rushes through the short loops and starves the long ones, so part of the floor is warm and part stays cold. The flow meters let you force fair shares.
- The rule: flow follows length. A long loop has more resistance, so it needs a higher set flow to deliver the same heat as a short loop. Short loops get throttled down; long loops get opened up. That is why you logged loop lengths in Step III.
- The method. With the pump running and all zones calling for heat, read each loop’s flow meter. Working loop by loop, open or close each flow meter until every loop sits at its target flow rate for its length. Small loops down, big loops up, until the whole manifold is even.
- Then re-check. Adjusting one loop shifts the others slightly, so do a second pass and confirm every flow meter holds its reading with the system running.
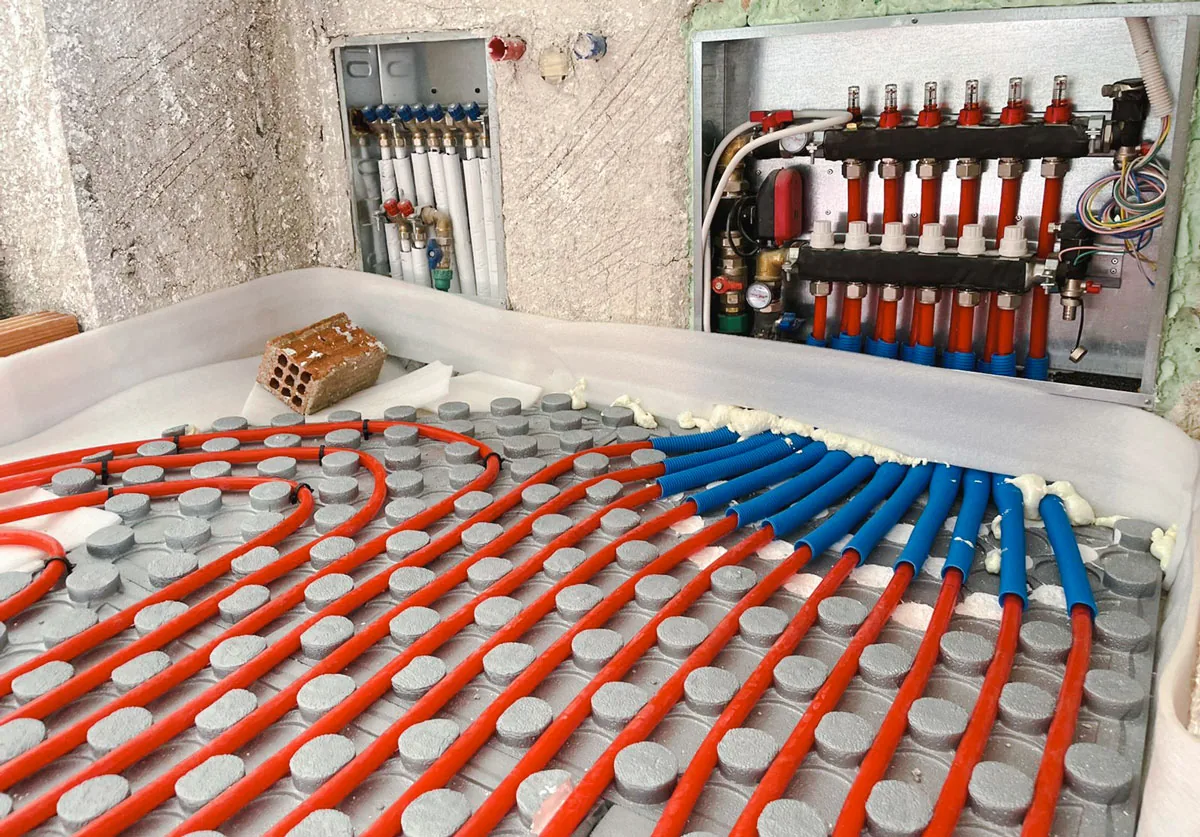
Design, Not Guesswork The project
Targets come from the system design
Target flow rates per loop depend on loop length, spacing, floor construction and design heat load — they come from the system design, not from a rule of thumb, so work to the project’s loop schedule where one exists. A properly balanced manifold means even floor temperature, lower return temperatures, and a system that runs quietly and efficiently for decades.
Every WARMHAUS manifold ships with flow meters built in, so balancing is a read-and-set job — no blind guessing at lockshield turns.
See WARMHAUS manifolds with built-in flow metersIV. Connecting the Actuators and Thermostat
The pipework moves heat; the controls decide when and where. This is the electrical side of the manifold, and it is what makes underfloor heating a zoned, room-by-room system instead of one big warm slab.
- Fit the actuators. An electrothermal actuator screws onto each valve on the return bar — one per loop. When it gets power it opens the valve; when power is cut it slowly closes. Group the loops that belong to one room into one zone.
- Wire to a wiring centre. Run each actuator back to a central wiring centre (junction box). This is the hub where actuators, thermostats, the pump and the heat source all connect, so the system acts together.
- Add the room thermostats. Wire each room’s thermostat to the zone it controls. When that room drops below its set temperature, the thermostat powers the zone’s actuators, they open, and warm water flows to just that room’s loops.
- Confirm the chain. Where the wiring centre also switches the pump and heat source, check that a call for heat starts the pump and fires the boiler — and stops them when every zone is satisfied. Test each zone individually before handover.
Note that most electrothermal actuators are “normally closed” — they need power to open — so nothing heats until a thermostat calls, which is exactly the fail-safe behaviour you want. Match the actuator voltage (commonly 24 V or 230 V) and the thermostat type to the system design; confirm the exact rating against the product datasheet before wiring. See WARMHAUS actuators & thermostats for the matched control side of the system.
Avoid the Callbacks Common mistakes
V. Common Manifold Mistakes — and How to Avoid Them
Almost every underfloor heating callback traces back to one of these. Check them off before you commission.
Pouring screed before pressure-testing
The costliest mistake there is. Always test and hold pressure before the pour — and keep the loops pressurised during it. (See Step IV.)
Skipping balancing
An unbalanced manifold gives warm and cold patches on the same floor. Set every flow meter to its loop length; do not leave them all wide open. (See the balancing section.)
Not purging air
Trapped air blocks a loop so it never heats. Bleed each loop individually at fill, and again after first firing.
Mounting the manifold un-level
A tilted manifold traps air and throws off flow readings. Level both bars with a spirit level.
Confusing flow and return, meters and actuators
Flow meters go on the flow bar (balancing); actuators go on the return bar (control). Swapping them means nothing controls correctly.
Over-tightening insert fittings
Hand-tight then to spec — cranking a compression fitting past its spec can crack it and cause the exact buried leak you are trying to avoid.
Feeding raw boiler-temperature water to the floor
Underfloor loops run at a lower temperature than radiators; use the mixing/pump group or blending valve so you do not stress the screed and pipe.
VI. One Certified Manufacturer for the Whole System
A manifold only installs cleanly when the parts are made to match — the pipe fits the fitting, the actuator fits the valve, the thermostat speaks to the wiring centre. That is the case for sourcing the whole system from one manufacturer rather than assembling it from three suppliers. WARMHAUS builds the complete underfloor heating system — oxygen-barrier PEX-B pipe, brass manifolds with built-in flow meters, and electrothermal actuators and thermostats — as part of a complete-range piping range, on our own extrusion, injection-moulding and machining lines. Manufacturing since 1993, certified to ISO 9001 and ISO 14001, with ISO 45001 and EU CE approvals. Those approvals are what a tender file or a customs desk actually asks for, and each one is verifiable in the issuing body’s own register rather than taken on our word. There is no minimum order quantity, and standard lead time is 45 days from order confirmation; pricing and exact certificate numbers are available on request — small trial orders welcome.
FAQ Common questions
Manifold Installation — Frequently Asked Questions
Mount the manifold level above the finished floor, connect the flow and return from the heat source, then connect each PEX-B loop to a manifold outlet with an insert fitting. Pressure-test and flush before the screed is poured, balance every loop with its flow meter, then fit the actuators and wire the thermostat. Test each zone before handover.
Balancing sets each loop’s flow meter so flow matches loop length — longer loops need more flow, shorter loops less. With the pump running and all zones calling, adjust each flow meter up or down until every loop reads its target rate, then do a second pass. This evens floor temperature and stops short loops stealing flow from long ones.
A manifold is a flow bar and a return bar, usually brass. The flow bar carries the flow meters that set each loop’s flow; the return bar carries the actuator valves. Add isolation valves, air vents, drain/fill valves and temperature gauges, plus a pump/mixing group where fitted. Actuators and a thermostat complete the control side — a 2-to-8-port manifold serves 2 to 8 loops.
Screw an electrothermal actuator onto each return-bar valve, then wire the actuators back to a wiring centre. Wire each room thermostat to its zone; when the room calls for heat, the actuators open that zone’s loops and, where wired, start the pump and heat source. Most actuators are normally closed, so nothing heats until a thermostat calls.
Yes — always. Fill and purge each loop, pressure-test, and leave the loops under pressure while the screed is poured. Testing before the pipe is buried is the single most important step: a leak found afterwards means breaking up the floor. Keeping loops pressurised during the pour also exposes any damage from screeding immediately.
Yes. WARMHAUS is a manufacturer, not a trading house, producing PEX-B underfloor-heating pipe, brass manifolds with flow meters, electrothermal actuators and thermostats on its own production lines — part of a complete product range from one source, manufacturing since 1993, certified to ISO 9001 and ISO 14001 with ISO 45001 and EU CE approvals. One matched, certified system means the fittings align and nothing is missing on site. There is no minimum order quantity, and standard lead time is 45 days from order confirmation.Pricing: available on request.
Start Here Let’s talk
Install it once, install it right — with one matched, certified system
Tell us your market and the systems you install or sell, and we will send specifications, certificates and distributor terms. Small trial orders welcome. Response time: within one working day.