A pressure test is the last moment a bad joint is cheap. Once the screed is poured and the walls closed, the same defect costs demolition, drying time and a second crew. The problem is that PPR does not behave like steel or copper under test: the gauge falls, crews call it a leak, and spend a day chasing a joint that was never faulty.
All figures below are general industry guidance: test pressures and durations are set by the project specification, the local code and the pipe manufacturer's datasheet, and those documents govern in any conflict.
I. Why PPR Pressure Testing Is Not Metal Pressure Testing
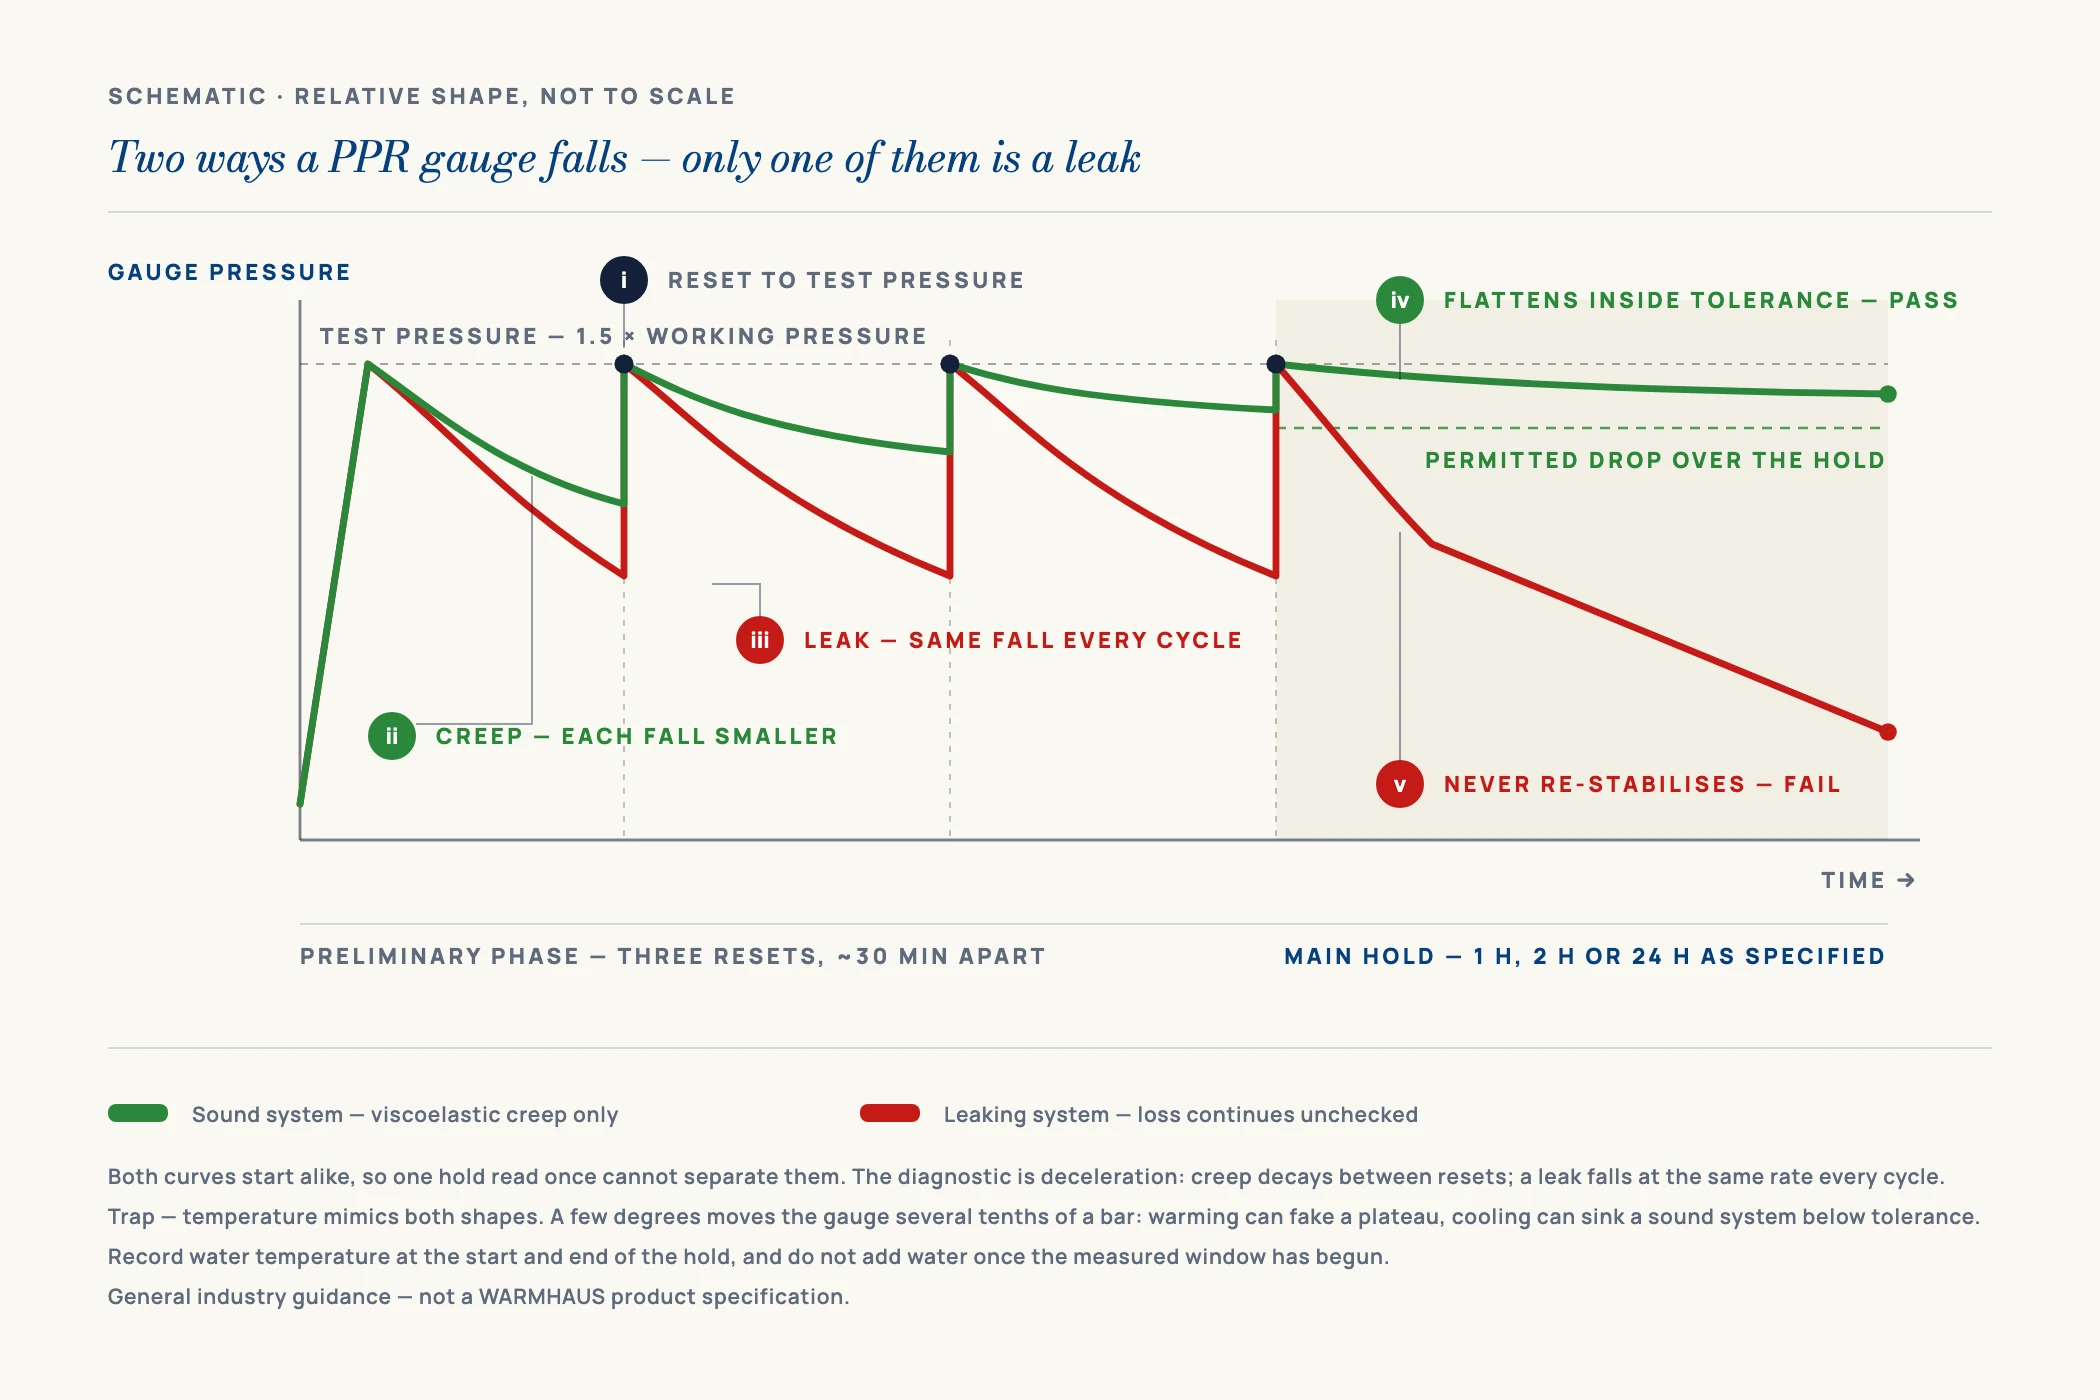
Polypropylene random copolymer is viscoelastic: under sustained pressure it expands slightly and keeps expanding for hours. That is elastic creep, not damage, and it has one consequence that dominates every PPR test: the pressure in a sealed PPR system falls even when there is no leak anywhere. The wall relaxes, internal volume grows, and the gauge reads the loss.
On a PPR system, a falling gauge is the expected result. What you are testing is not whether the pressure drops, but whether it stabilises.
This is why PPR procedures are staged rather than a single hold: you pressurise, let the material relax, re-pressurise, and only then start the window that decides pass or fail. Apply the metal-pipe rule — any drop is a failure — and you fail sound systems; ignore drops and you pass leaking ones.
Temperature is the second complication: a system filled with cold mains water and tested in afternoon sun shows a rise that has nothing to do with tightness. As a rough figure, a few degrees can move the gauge by several tenths of a bar. Test in stable conditions and record water temperature at the start and end of the hold.
II. Before You Pressurise: The Preparation That Decides the Result
Most failed PPR pressure tests are failures of preparation, not pipework.
Let every joint cool completely
A hot-melt weld is still setting after the fitting feels cool to the hand, and pressurising it stresses material that has not finished crystallising. Allow the full cooling time for the diameter, then longer — an hour on the last joints welded. Fit clips and brackets before testing too: unsupported PPR moves under pressure.
Leave the joints visible
Test before screeding, plastering or boxing in — any joint you cannot see is one you cannot locate if the test fails. Where pipe must be covered, keep it under pressure while the covering goes on.
Isolate everything that cannot take the test pressure
Test pressure is well above working pressure and appliances are not rated for it. Remove or valve off cylinders, water heaters, filters, mixing valves, expansion vessels and tap cartridges, and cap the branch ends — a test cap is cheaper than a burst mixer.
Fill slowly from the lowest point and vent from the highest
Trapped air is the most common cause of a wandering gauge: it compresses, masks small leaks and drifts the reading as it migrates upward. Fill from the bottom, open every high-point vent until water runs steady, then close them from the lowest upward.
Fit a gauge you can actually read, and allow for static head
A gauge running to 60 bar cannot resolve 0.2 bar in a 15 bar test: choose one whose test pressure sits mid-range, connected at the lowest point. Every 10 metres of height adds roughly 1 bar, so basement gauge and top-floor pipe differ.
III. PPR Pressure Test: Test Pressure and Duration Table
The convention is to set test pressure as a multiple of the system design working pressure, not a fixed number, and to hold it in stages so material relaxation is separated from leakage. These are general industry guidance figures, not a WARMHAUS specification and not a substitute for the project documents.
| Test parameter | Typical value (general guidance) | What it is for | Notes |
|---|---|---|---|
| Test pressure — cold water | 1.5 × system design working pressure | Proving joints under a margin above service | Often 10–15 bar on domestic hot & cold systems |
| Test pressure — underfloor heating loops | 1.5 × working pressure, often capped by spec | Proving loops before screed is poured | Keep pressurised while screed goes down |
| Upper limit | Never above the PN of the weakest component | Protecting valves, fittings, appliances | The weakest item sets the ceiling |
| Preliminary phase | Re-pressurise to test pressure after ~30 min | Absorbing initial elastic expansion | Usually repeated once or twice |
| Main hold — short procedure | 1 hour at test pressure | Acceptance check on small circuits | Only where the specification allows |
| Main hold — full procedure | 2 hours minimum, 24 h on many specs | Formal acceptance and sign-off | 24 h common for buried/screeded pipework |
| Permitted drop during main hold | Typically ≤ 0.2 bar over the window | The pass/fail criterion | Exact figure set by the specification |
| Water temperature | Stable, recorded at start and end | Making the reading interpretable | A few °C moves the gauge measurably |
| Fluid | Clean water (hydrostatic) | Standard method for PPR | Air testing is higher-risk — see below |
Values are general industry guidance, not a WARMHAUS-specific specification. Test pressures, staging and permitted drops differ between national codes and project specifications. Always confirm against the project specification, the local code, and the datasheet of the pipe and fittings you are installing.
Two entries matter most. The ceiling is set by the weakest component, not the pipe: a PN20 run with a lower-rated valve is a PN-of-the-valve system. And the permitted drop is a specification value — agree it beforehand, filed with your material certification and quality documentation.
IV. The Test Procedure, Stage by Stage
Staging lets the pipe finish expanding before the measurement window, so what you measure is leakage, not material behaviour.
I. Fill, vent and settle
Fill slowly from the lowest point, venting from every high point until flow is steady and air-free, then close the vents from the bottom upward. Leave it until water and pipe reach ambient temperature, and record it.
II. Raise to test pressure, then re-pressurise in cycles
Pump up gradually — a rapid rise surges and can lift a marginal fitting off. The gauge will drop within minutes; that is the pipe expanding. After roughly thirty minutes pump back to full test pressure, wait and repeat. Two or three cycles is typical, and the signal you want is that the decay rate is clearly slowing between cycles. If the third drop is as fast as the first, you have a genuine leak.
III. Hold, and measure the window that counts
Bring the system back to full test pressure a last time, note the reading and time, and start the main hold — one hour, two, or twenty-four, as specified. Do not add water during this window. At the end, read gauge and water temperature again; the difference, corrected for temperature, is what the test is judged on. While it holds, walk every accessible joint with a dry cloth and torch, checking caps, valves and the test connection.
IV. Depressurise in a controlled way and record the result
Release pressure slowly through a low-point drain, not by cracking a fitting. Then write the record while it is fresh: date, section tested, test pressure, staging, start and end readings and water temperatures, hold duration, gauge identification and who was present. An undocumented test did not happen as far as a consultant is concerned — and where a pass depends on the pipe class installed, cross-check the PPR pipe specifications.
V. Reading a Failed Test: What the Gauge Is Telling You
When a test fails, the pattern of the drop narrows the cause faster than a joint-by-joint search.
A fast drop to near zero is a large opening — an uncapped branch, an unclosed valve, an unwelded fitting — so check the ends and test rig first. A steady, linear drop that does not slow across cycles is a real leak; steadiness is the diagnostic, because relaxation decelerates and a leak does not.
A decelerating drop that flattens out is normal viscoelastic behaviour — a system reaching a stable plateau within tolerance has passed, and this is the most misread result in PPR testing. A wandering reading is usually temperature, trapped air, or both: vent again, shade exposed runs, equalise and repeat.
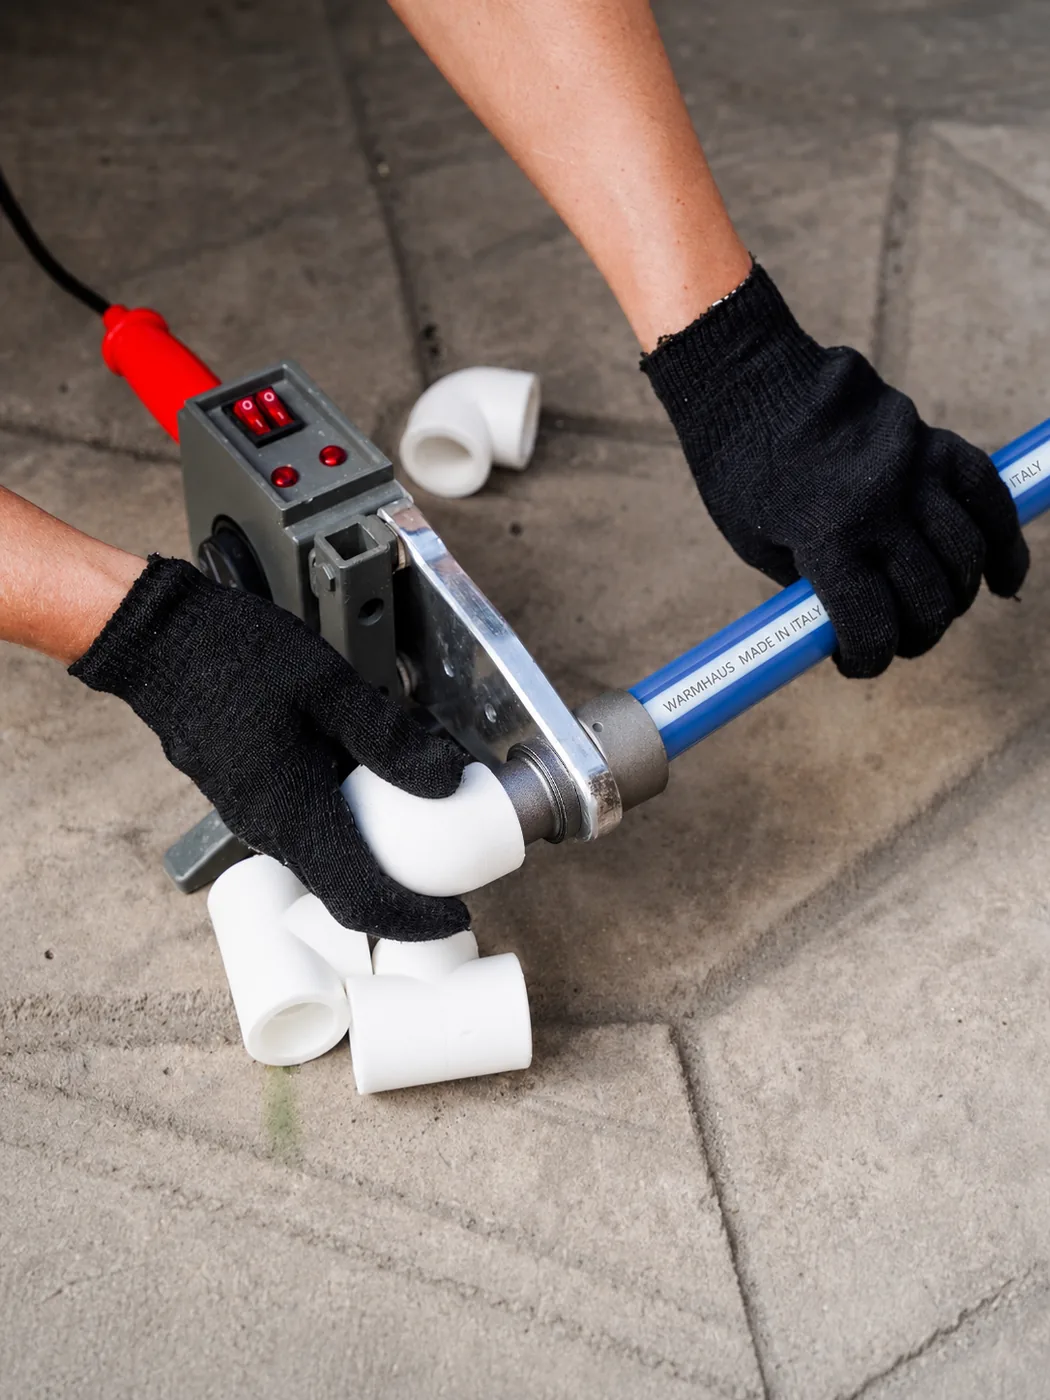
Where the drop is genuine, the cause usually traces to the weld: under-heating, twisting, insufficient depth or a joint disturbed before it cooled — see our guide to hot-melt welding PPR pipe. Never reweld under pressure: depressurise, cut it out, remake it with a fresh socket and coupler.
VI. Underfloor Loops, Mixed Materials and Air Testing
Underfloor heating loops are tested before the screed goes down and then kept under pressure while it is poured and cured, so damage from a wheelbarrow or rake shows while the screed is workable. Test each loop from the manifold with the others isolated — see our underfloor heating manifold installation guide. Mixed-material systems fail at transitions more often than in the plastic, so test sections separately first.
Air testing is far more hazardous than water and belongs only where the specification explicitly allows it, under a written method statement. Note too that PPR derates as temperature rises: a circuit passing a cold test at 1.5 × working pressure is not proven at 70 °C. The dies, cutters and machines for durable joints are in the welding tool range.
VII. Testing Is Easier When the System Comes From One Source
A pressure test judges the whole assembly, and every mismatched component is a place to fail. Socket dimensions that drift between suppliers, wall thicknesses that vary within a nominal PN class, valves whose rating is not what the box says — none of it is visible at installation, and all of it shows up on the gauge. WARMHAUS is a manufacturer of PPR, PEX and brass piping systems, not a trading company. The extrusion, injection-moulding and machining lines are our own, so pipe, fittings, valves and tools are held to one internal standard — manufacturing since 1993, working to DIN 8077 / DIN 8078, with raw material from Hyosung, Borealis and LG.
For handover paperwork, the system is ISO 9001 / ISO 14001 / ISO 45001 certified, EU CE marked and SGS tested, and our quality control process is documented for consultants. There is no MOQ, and standard lead time is 45 days. Request the PPR system specifications and certification file — tell us your market and the diameters you install. Certificate documents, datasheets and pricing: available on request.